Essentially, Zapier acts as the intermediary between Zoho and Postalytics. Zapier is the easy to use, yet powerful integration platform that both Zoho and Postalytics have written interfaces to.
In order to use the Zapier Zoho direct mail integration, you’ll need to do a little setup in each of the tools. A Zapier integration is a called “Zap”. You can setup many different Zaps to accomplish many different objectives. Once setup, the Zapier Zoho direct mail integration will run for as long as you have Postalytics Direct Mail Credits available.
Finally, you get to test your integration and have Postalytics generate PDF’s that are not printed or mailed, prior to turning on your live campaign.
2 Styles of Campaigns: Drip and Batch
There are often two unique types of campaigns that clients will develop using the Zoho/Zapier integration. “Drip” style campaigns are designed to trigger individual mailpieces out to contacts in Zoho when particular criteria has been met (like in a step of a workflow) while “Batch” style campaigns are met to trigger several contacts at once to have mailpieces generated for them.
You can use this integration for both “Drip” and “Batch” style campaigns. Read on for information on both of them.
Step 1: Set up a “Triggered Drip” campaign in Postalytics using the Zapier Action method
Postalytics Triggered Drip Campaigns are the revolutionary new way that individual mail pieces can be automatically sent to Zoho Contacts. Setting up the campaign involves creating a postcard or letter template, proofing it, and using the Postalytics Triggered Drip Campaign wizard. When you setup your Triggered Drip campaign, be sure to choose the Zapier Integration at the beginning of the process.
Follow the “Step One” instructions from the link below:
How To Setup The Send Direct Mail Zapier Action
Step 2: Start Building Your “Zap” Between Zoho and Postalytics
Login to you Zapier account and click Create Zap
Choose Zoho CRM from the App Directory. *Note Zoho CRM is a Premium App in Zapier. Because of this Zapier will not allow you to turn on your Zap with a free account. You will need to update your account to one of the Zapier paid plans.

Choose your Zoho Trigger Event from the drop down list and click Continue

Select your Zoho CRM account if already connected to Zapier. Or, add a new account and provide your login information as prompted in the connection wizard.

Once connected, choose the Zoho Module that your Triggered Event corresponds to.
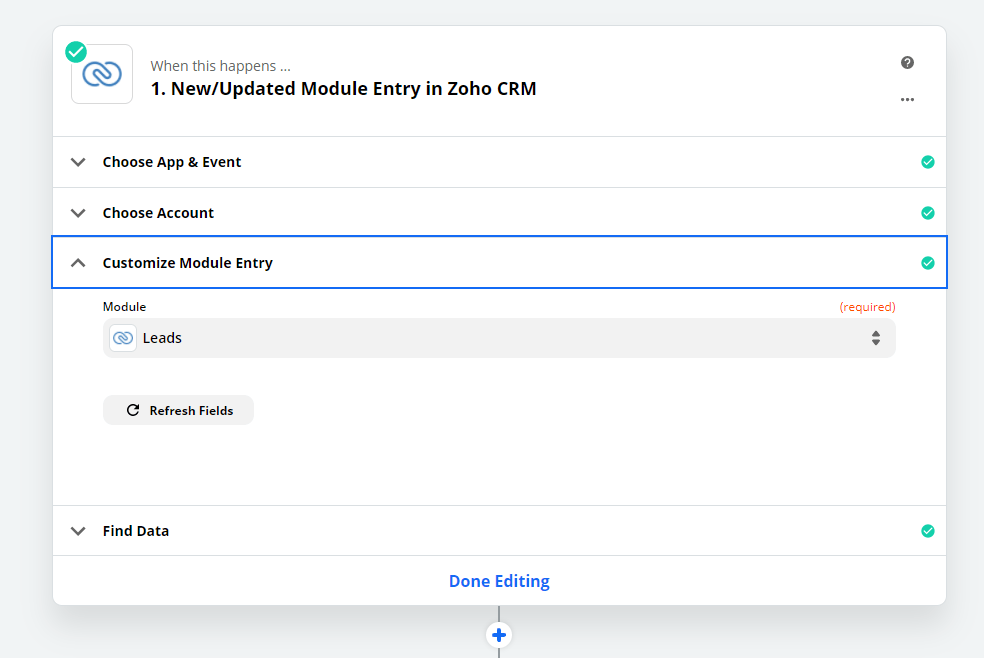
Click Continue and then Test Trigger. Zapier will return data from your selected Zoho Module for you to review and confirm.
It is important that the records in your Zoho Module contain at a minimum, the following fields:
- First Name/Last Name (or Company)
- Mailing Address
- City
- State
- Zip Code
Click Continue once confirmed.
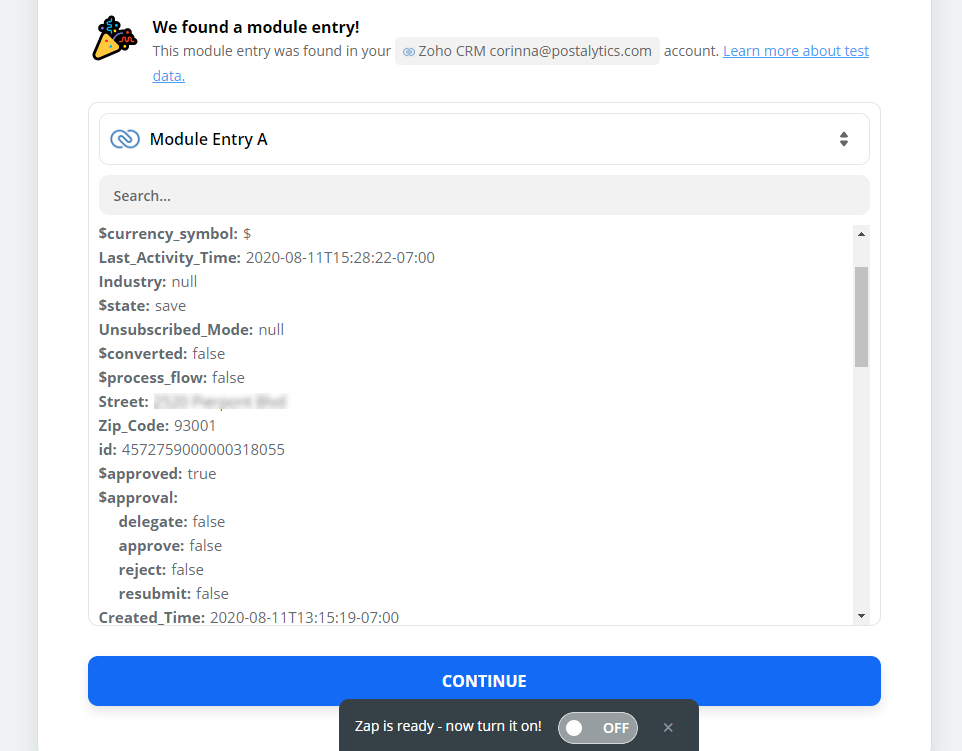
After your Trigger is configured in Zoho and connected through Zapier, you’ll finish up your Zap by connecting to Postalytics.
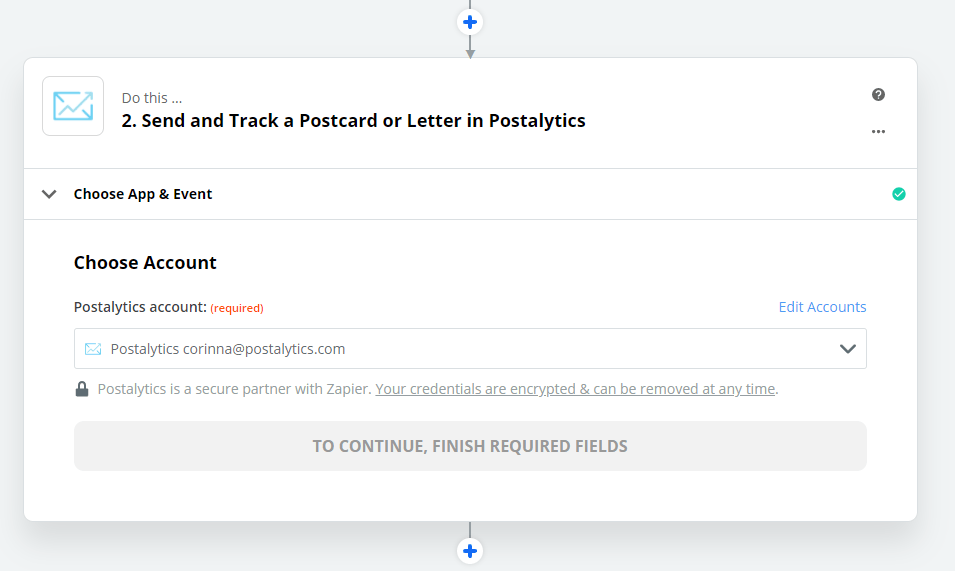
Step 3: Configure the Postalytics Action in Zapier
Select the Postalytics App from the Zapier library and Send and Track a Postcard or Letter will populate as the action.

Select your Postalytics account. Follow the prompts in the connection wizard to connect to your Postalytics account if you don’t have it set up already.
Choose the Triggered Drip Campaign that you set up during Step 1, and map the fields. The minimum fields required are:
- First Name/Last Name (or Company)
- Mailing Address
- City
- State
- Zip Code
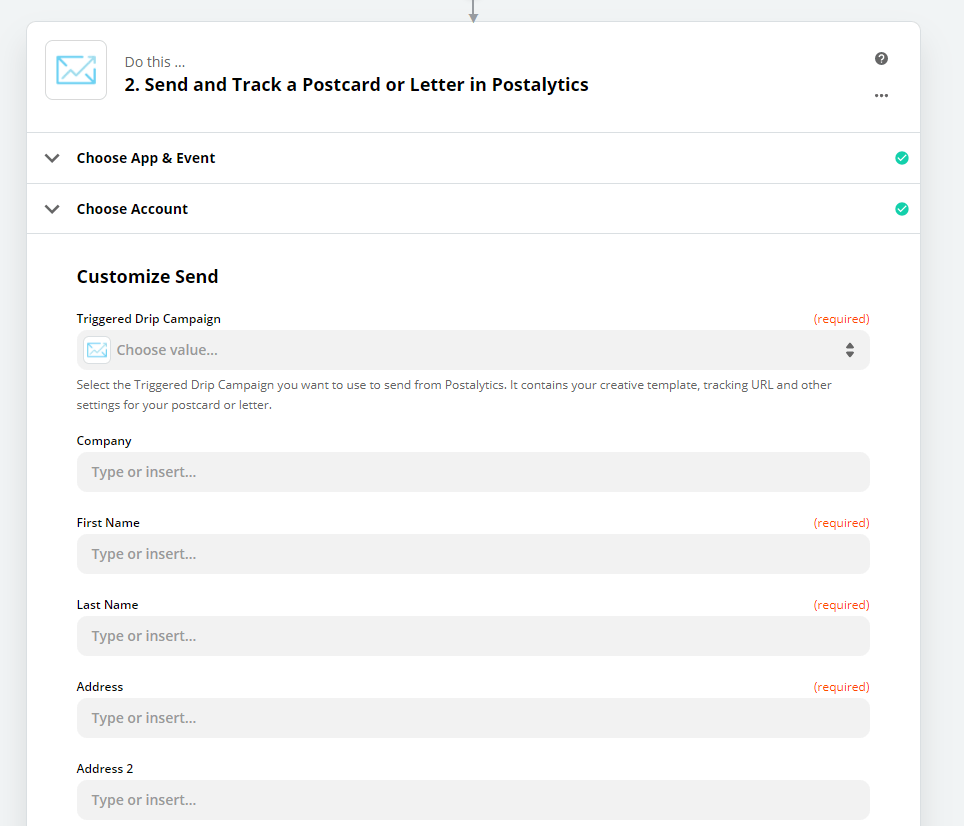
Click Test and Continue to confirm the connection with Postalytics. If send was successful, you are now ready to turn on your Zap.

You can continue to Step 4 below to test your campaign to make sure it is firing correctly, or read on about setting up Triggered Drip Batch Campaigns.
How To Setup A Triggered Drip Batch Campaign In Zoho And Zapier:
A Triggered Drip Batch Campaign is similar to a traditional Triggered Drip Direct Mail Campaign, and will need to be set up with the same steps above.
The difference will be in the number of records triggered. Instead of an individual record being triggered during a lifecycle by a workflow, multiple records are triggered in a module, based on filtering, workflow field update, manual field update, or with tags.
By using a Triggered Drip Batch, you will be able to utilize the Zoho and Postalytics integration through Zapier, to receive the offline delivery and online response activity tracking, unique to Postalytics, on a larger scale. Essentially you will be sending a Smart Send campaign with the added benefit of receiving the tracking data back to Zoho rather than having it available only in your Postalytics dashboard.
Once you’ve created your Postalytics Triggered Drip campaign through Zapier as in Step 1 above, you’ll be ready to set up your Zap. This will also be done in the same steps as above, but it is important to note that for multiple records to Trigger within Zapier, your trigger cannot be an “Instant” trigger

For this example, we’ll create a mass field update, manually, within the Contacts Module to trigger multiple records to send to Postalytics.
In the Contacts Module, select the contacts you want to update. If you want to select all records, click the box to the left of “Contact Name” in the header area.
Select Mass Update from the drop down list.

Next, select the field to update from the drop down list. If this is a pre-populated field, there will be a second drop down list to the right. If it is not pre-populated, you can type in the information to add to that field.

You’ll then receive an “Updated Successfully” message and can see the fields updated for the contacts you selected. These updated records will be sent to Postalytics through the Zapier integration.

Step 4: Test your Zap from start to finish
To further test your Zap, go into the Zoho module used in your Zap. Create the action to trigger within Zappier, either with an individual record, if Triggered Drip campaign, or multiple records, if Triggered Drip Batch campaign. Zapier will record when the action has been completed. You can view this in the Task History in the drop down menu to the right of your Zap.
*Note that when Batch Triggers happen they will take longer to record in the Task History than an individual trigger.
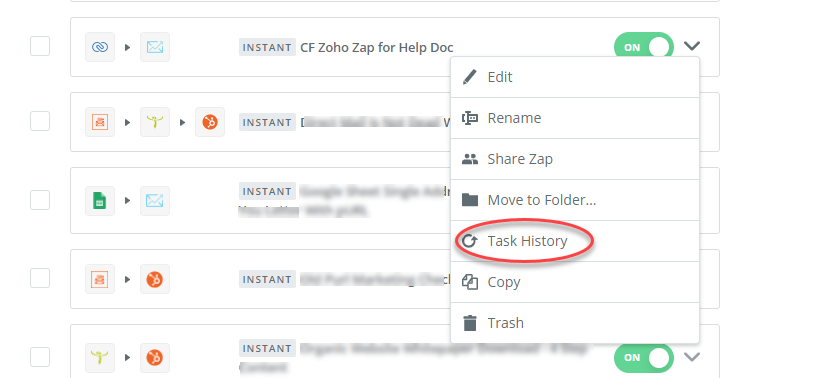
When the record is sent through Zapier, you’ll see a Success message in the Task History.
This is an example of a Triggered Drip Zapier Task Status:

And an example of a Triggered Drip Batch Zapier Task Status:

You’ll now want to return to your Postalytics campaign to view the data sent over. There may be a delay up to 15 min for the data to transfer from Zapier to Postalytics.
Your campaign will be in test mode and will show the number of records sent for the test. Click Preview Created Mail to view the test data mail pieces.
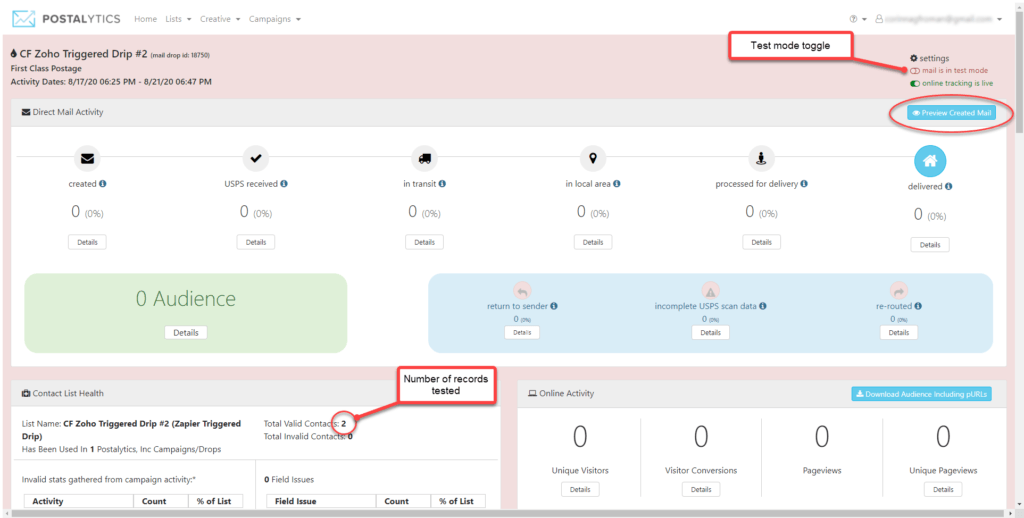
The test mail pieces are created as PDF’s and will not be printed or mailed by our print partners.

Once testing is completed, you’ll be ready to toggle the campaign to “Live Mode” and have your mail pieces sent out as your Triggers occur.
*Important* — Don’t forget to turn your campaign live when you’re ready to go to production. If you don’t, none of your mail pieces will mail, they’ll be collected in “Test Mode”.
Learn How To Use Postalytics Status Codes Via Zapier
You can also set up a Zap to receive Postalytics Status Codes back for use in other workflows, automations and processes. Learn more about it in our help doc “Use Postalytics Status Codes via Zapier”.