Postalytics Status Codes or ‘Events’ can be sent from Postalytics to your CRM, via our Zapier Campaign Event Trigger. Postalytics uses Status Codes to:
- Track the journey through the Postal Service scan events
- Indicate that a mail recipient has entered their pURL to respond to your offer
- Trace mail recipients who have reached their “Goal URL” indicating campaign success
Having this data directly within your CRM can help you accomplish a wide variety of integration tasks and continue workflows and processes that could never before be done.
Common Postalytics Status Code Use Cases
Postalytics and your CRM can be used together, via Zapier, to automate many tasks that have traditionally been too hard, time consuming or expensive to attempt with traditional direct mail technology. Typically, these automation tasks involve workflows. Some typical things that marketers focus on include:
- Sending an email to a mail recipient based on the timing of the mail delivery
- Triggering the next step in a workflow
- Sending a text message to a sales rep when a mail recipient completes their online goal URL
What Do I Need To Do To Receive Postalytics Status Codes, via Zapier?
Postalytics Status Codes can be received back to your CRM through a Zapier ‘Zap’.
Zapier connects Postalytics to your CRM and allows data to flow between the two software applications. There is some set up required, but once tested and the Zap is live, it will run continuously until you decide to turn it off.
** Note: Zapier now has over 3,000 supported web services, however, may not support your specific CRM. You can search to see if your app is supported on the Zapier Home Page.
Setting Up Your Zapier Zap
In this example we’ll be creating a Zap to send Postalytics Status Code Updates back to the CRM Pipedrive. Even if you don’t use Pipedrive as your CRM, the Zap set up within Zapier will be similar. Postalytics is the ‘Trigger’ and your CRM is the ‘Action’. The most common differences will be the available options in setting up step 2 ‘Action’.
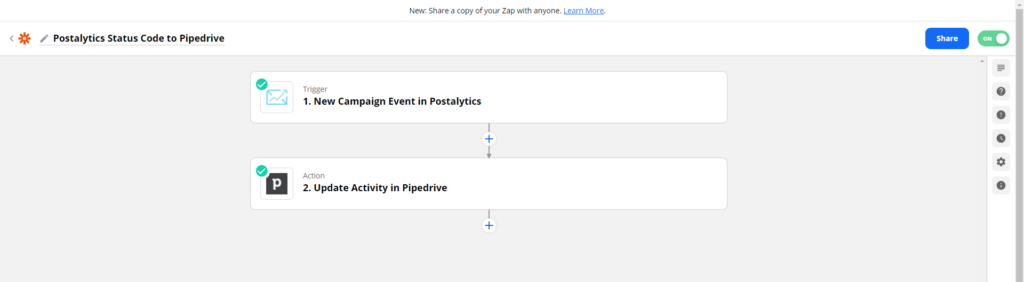
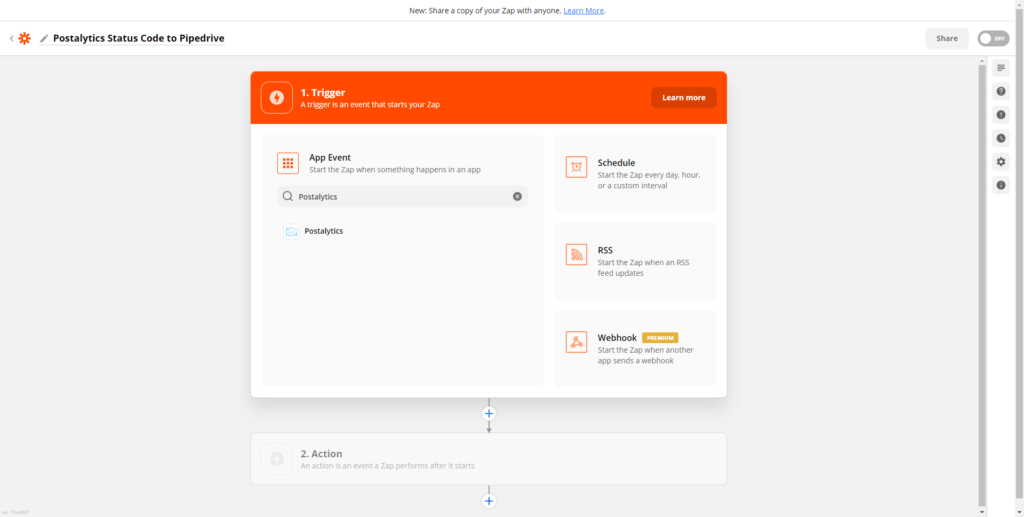
From your Zapier home page, click 'Create a New Zap' and name it. Then search for and select 'Postalytics' as 1. ‘Trigger’.
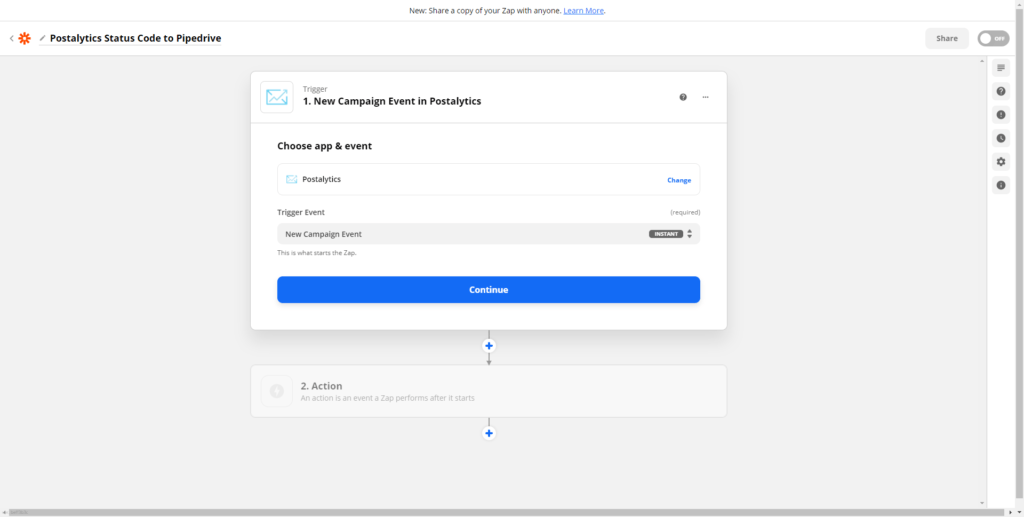
On the next screen select the ‘Trigger Event’. There will only be one option to select here – New Campaign Event. Click 'Continue'.
Next you’ll choose the Postalytics account to connect to. Click 'Continue'.
** Note: If you are an Agency Edition user, connect the Client account with the Postalytics Campaign that you want to receive status codes back. You will not connect your Agency account.

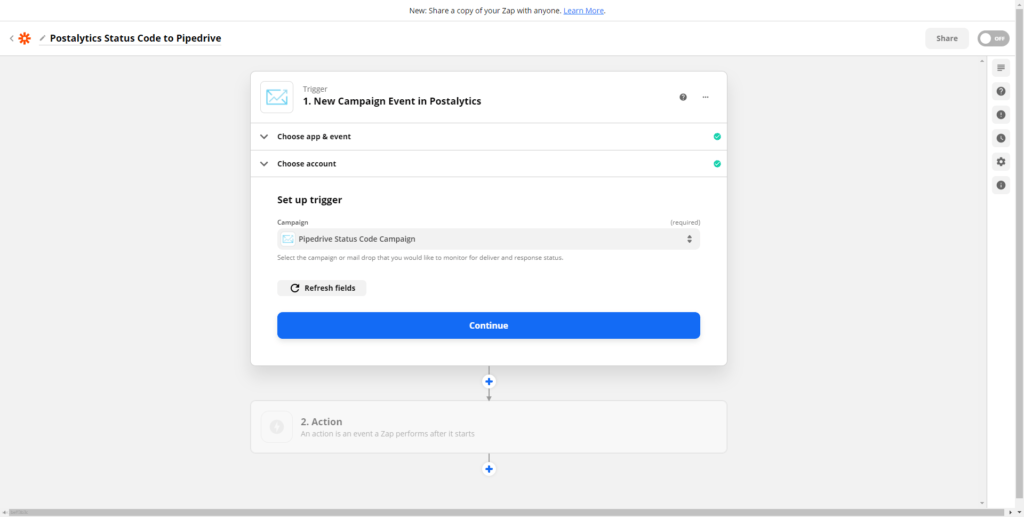
You’ll then select the Postalytics Campaign that you want to receive the Status Codes from. Click 'Continue'.
** Note: Each Campaign that you want to receive codes from will need to be set up with its own Zap.
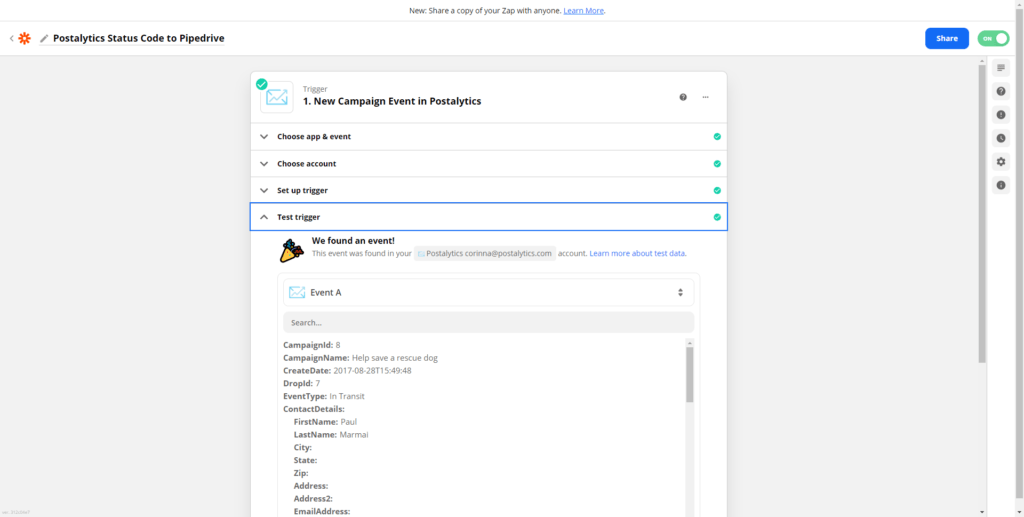
Allow Zapier to run a test and provide back data from your Postalytics account to ensure the connection.
Once the connection is confirmed, move on to Step 2. ‘Action’.
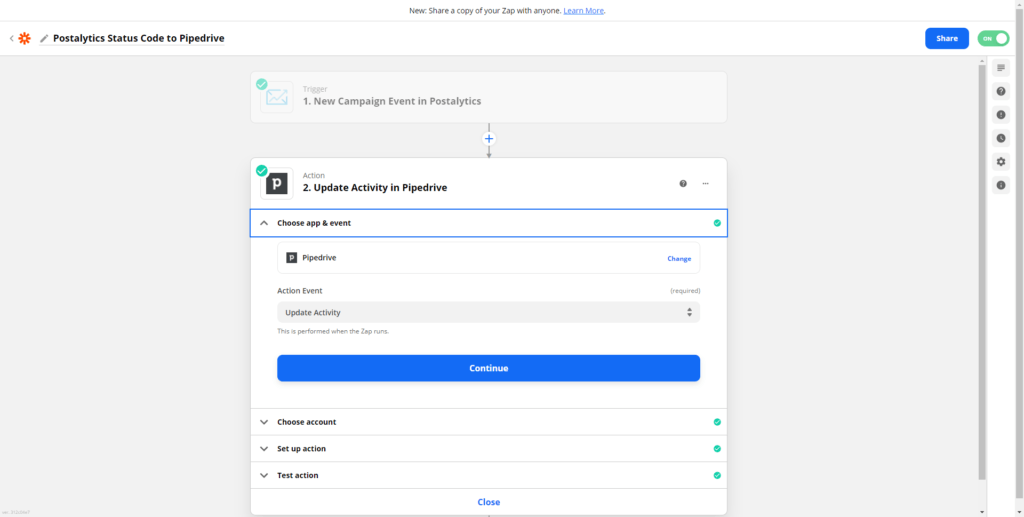
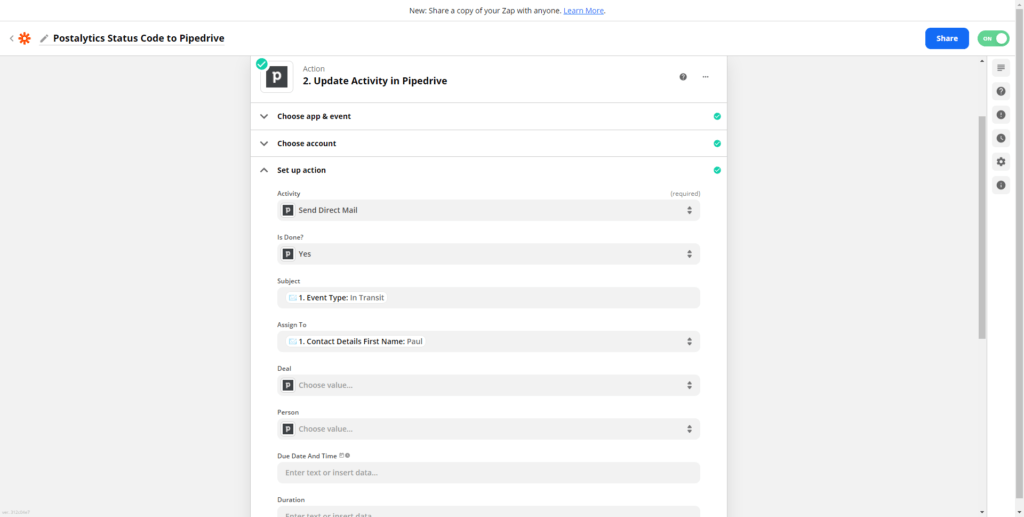
Choose Pipedrive, or your CRM app, and the ‘Action Event’ that will update with the Postalytics Status Codes. This is where the options will differ depending on the CRM and what fields are accessible to Zapier.
In this example we are updating an Activity in Pipedrive.
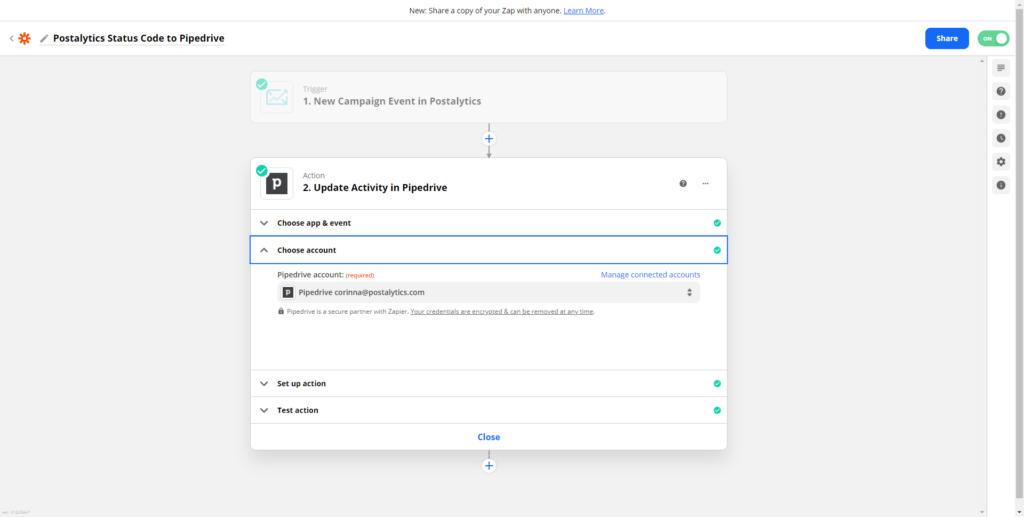
Next, you’ll connect to your Pipedrive or other CRM account. Click 'Continue'.
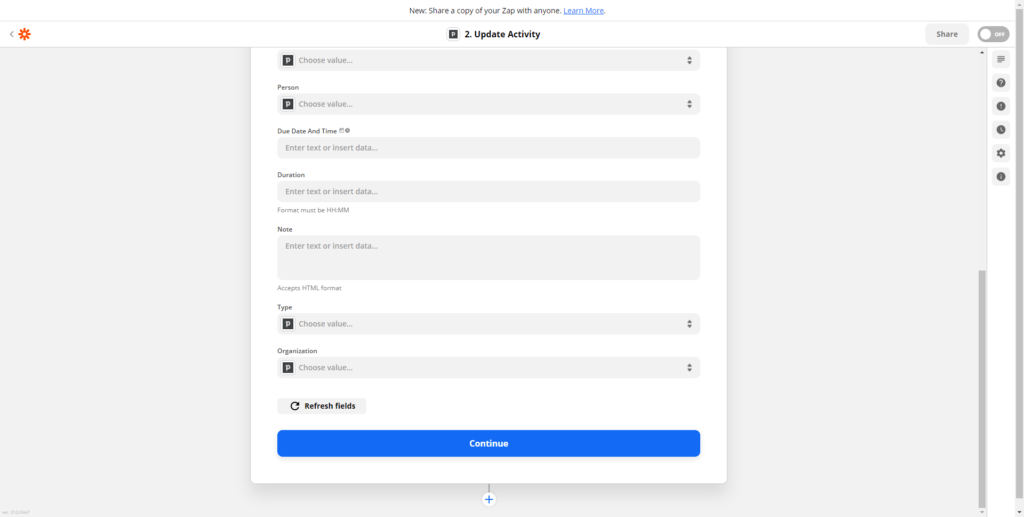
Once connected, you’ll see the available options to choose where the Postalytics Status Code Updates can populate in your specific CRM. Make your selection and complete the additional options depending on your CRM and selection. Click 'Continue'.
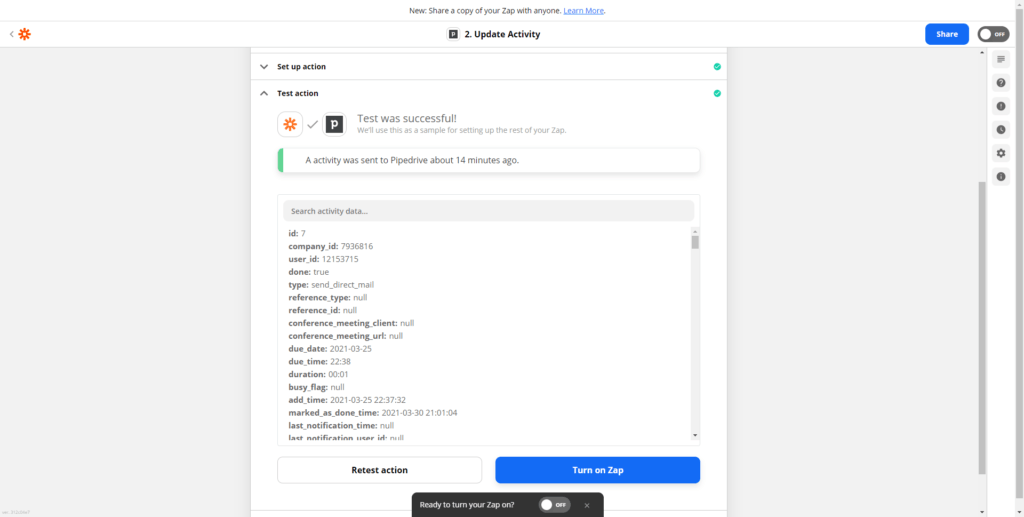
Zapier is now ready to test the Zap. If you receive a ‘Test was Successful’ message, you are ready to turn on the Zap! Click ‘Turn on Zap’.
Now as your Postalytics Campaign moves through the process your CRM will be updated with the Status Codes, which you can use for notifications, or further automation/workflows.
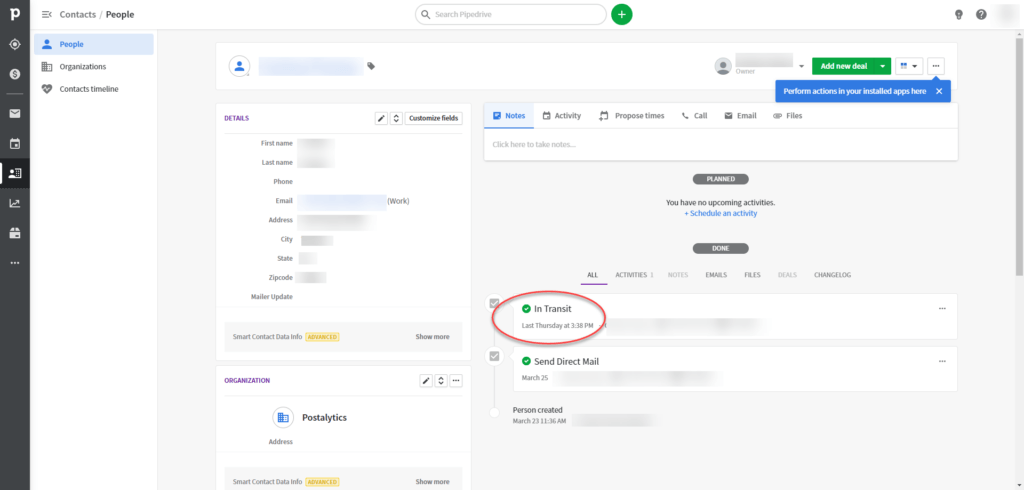
Here you’ll see in Pipedrive that the Status Code was updated in the Contact’s Activity, as we set it up to do. This piece is ‘In Transit’ and on it’s way to being delivered.
What Are The Postalytics Status Codes That Will Appear In Your CRM?
MailPieceCreated – the mailpiece final PDF has been generated and sent to the print delivery network for fulfillment.
Addressed – some campaigns will create an event when the addressing of the mailpiece is completed.
Printed – some campaigns will create an event when the printing of the mailpiece is completed.
Mailed – the mailpiece has received the initial scan from the USPS (this is often 12-24 hours after the hand-off from the printer to the USPS).
InTransit – the mailpiece is being processed at the entry/origin facility.
InLocalArea – the mailpiece is being processed at the destination facility.
ProcessedForDelivery – the mailpiece has been greenlit for delivery at the recipient’s nearest postal facility. The mailpiece should reach the mailbox within 1 to 2 business days of this scan event. Our experience is that the majority of deliveries occur within 1 day of this scan.
**Note** Use this status code to trigger other actions based on mail delivery. For example, you can use the Processed For Delivery event, with a 2 day “Wait” in an automation sequence, to send automated messages out to coincide with mail delivery.
ReRouted – the mailpiece is re-routed due to recipient change of address, address errors, or USPS relabeling of barcode/ID tag area.
ReturnedToSender – the mailpiece is being returned to sender due to barcode, ID tag area, or address errors.
pURLOpened – the recipient has visited their pURL. Each visit will trigger a new event.
pURLCompleted – the recipient has visited their Goal URL. Each visit will trigger a new event.
Status Codes for Canadian Mailings
Because Canada Post does not provide tracking through the mail stream, mailings in Canada will have fewer Status Codes that will appear. For Canadian mailings, the Status Codes that you will see are:
MailPieceCreated – the mailpiece final PDF has been generated and sent to the print delivery network for fulfillment.
Addressed – the addressing of the mailpiece has been completed.
Printed – the printing of the mailpiece has been completed.
Mailed – the printer has handed off the mailpiece to Canada Post.
pURLOpened – the recipient has visited their pURL. Each visit will trigger a new event.
pURLCompleted – the recipient has visited their Goal URL. Each visit will trigger a new event.