What are pURLs and why would I use them?
A pURL (Personalized URL) is a unique URL printed on a direct mail piece used to track the online response of direct mail campaigns for each recipient.
More and more, direct mail recipients prefer to respond online. Fewer are picking up the phone to call, and fewer yet are filling out the old business reply cards. By giving the mail recipient a specific place to reply to an offer, you are controlling the content they view, AND you are tracking their individual online activity. Postalytics gives incredibly detailed data about how mail recipients respond online because we make it easy to include a pURL on every mailpiece.
How do Postalytics pURLs work?
Postalytics pURLs work very differently from traditional pURL marketing systems.

First, they’re free! The tools required to generate pURLs and track response are bundled into Postalytics. You can even generate unique QR Codes to drive even more of your audience to their pURLs. (Learn how Postalytics QR Codes work here.)
Second, you won’t need to purchase and use specialized landing page software. Postalytics pURLs can be used with any modern landing page, web content management system, or e-commerce system.
When your mail recipients respond by entering their pURL or scanning their QR code, Postalytics will identify the recipient, and redirect them to your landing page of choice.
Your pURLs, landing pages (and Goal Conversion URLs) are entered when you set up your campaigns. There’s a few things to do in order to support them.
I Want To Get Started. What’s Next?
There are 5 key steps to getting pURLs configured and printed.
- Set up a domain to host your pURLs – Learn More
- Copy the tracking code into your landing page(s) – Learn More
- Drop the pURL variable or QR code image into your creative – Learn More
- Configure your pURLs for printing/production in the Campaign Wizard
- Test your pURLs with the “Test Mode” tools – Learn More
When your mail recipients respond by entering their pURL, Postalytics will identify the recipient, and redirect them to your landing page of choice (your starting URL). The pURL tells us who the recipient is, the tracking code on the landing page allows us to see how the recipient interacts with your landing page/website.
If you’re early in your Postalytics account setup, you’ll see a checklist of items. Click on Step 2 to work on getting your domain and tracking code.

If you’re further along and the Getting Started checklist has been removed, below are the menu selections below your user name you’ll need to go to in order to get your domain and tracking code set up.
First, you’ll need a domain to “host” your pURLs. This is the domain that will be printed on your mailer, and will support each unique pURL that is generated by Postalytics.
You can use the same domain in as many campaigns as you choose.
There are some technical settings that need to be set up precisely in order to make the pURLs work. For this reason, we recommend that you purchase a vanity domain through the Postalytics domain tool. All of the technical settings will be taken care of!
You can modify and map an existing domain that you own to be able to use it with Postalytics pURLs. It requires access to the domain registrar where the domain is hosted, and some technical competency.
For this and other reasons, we DO NOT recommend using your primary website domain to host pURLs.
Next, you’ll need to drop the Postalytics Tracking Code into the HTML of your landing page(s) or website that you want your recipients to visit. We recommend putting it anywhere in the footer area (before the </footer> tag.)
Learn more about the Postalytics Tracking Code.
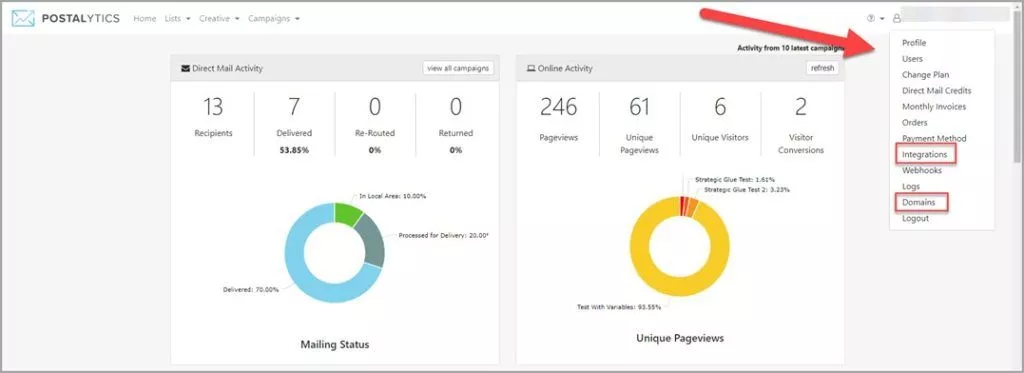
You can access the tracking code from the “Integrations” menu selection beneath your user name.
It is important that the full tracking code appear in the source code of the page. For this reason, we DO NOT recommend using a tool like Google Tag Manager, as some tools will obfuscate all or parts of the tracking code.
Third, you’ll need to insert the pURL “Variable” into your creative.
This is a relatively simple process in the Postalytics direct mail editor.
When you’re working in either the postcard or letter editor, you can use our simple pURL tool in the “Tracking” section on the left side of the builder. See below:

Note that we recommend using a full width, offset color shape to layer the variable on top of. This will ensure that you get plenty of space for the final pURL to be printed, and you can make it a visual
The variable is a placeholder for the final pURL structure that you’ll choose in the campaign wizard (you can play with different formats with live data in the editor “Proof” tool.)
This way, you can use the same template in multiple campaigns, modifying the pURL during the campaign setup, rather than in the template each time. The Variable Data value looks like this:

When you “Proof” your template (which is required to use the template in a campaign), you’ll be able to test your pURL with data to make sure that the font size is correct. Our proofing process will use the longest possible combination of values (if you choose a friendly URL format) when the proof is created.
Fourth – you’ll choose your pURL format in the Campaign Wizard.
Formatting your pURLs falls under the ‘Tracking’ step when setting up your campaign (See Images Below)
Determine your URL Format (Two Options):
- Friendly URL String
- Choose from any two columns of the list (example – first name, last name)

2. Random URL Strings
- Random group of letters/numbers

There is no definitive ‘Best Practice’ when it comes to using a Friendly URL vs. Random URL. Ask yourself the following questions: Do I want to make it as easy as possible to for my recipients to enter the URL into their browser? Then keep it short and go with the Random URL
Or
Do I want the pURLs to pop off the page with some personalization? Then go with the friendly URLs.
It helps to think about your audience and the nature of your campaign. An association may want to go with the friendly URLs while a privacy conscious financial company may want to avoid disclosing data on the mail piece.
URL Ending
Adding an ending URL can be used to identify a promotion or the date. It will also prevent duplicate pURLs if you plan to use your domain for multiple campaigns. Any combination of letters and numbers will work, just don’t use special characters or symbols in your URL name.
NOTE: If the domain selected has been used before and the ending URL is not unique, you’ll receive a system message asking you to change the structure before you’re able to move forward.
Fifth – Test Your pURLs using the pURL “Test Mode”
Postalytics has built a tool that lets you test out your pURLs and not clutter up your response tracking metrics. “Test Mode” is designed to enable you to download and test your pURLs and make sure they are rendering properly.
You can change your online tracking status to “Test Mode” from within your Campaign Dashboard Settings page:

Here’s a link to the full article on testing your pURLs and then setting your campaign back in “Live Mode”: How to Test Your pURLs
How much do Postalytics pURLs cost me?
You can print a pURL on each and every piece of mail that you send, for no additional cost.
Think about this – most direct mail professionals are paying for the pURL marketing software, the time it takes to create specialized landing pages, and a per piece fee each time they want to use pURLs.
You get to use pURLs for free, as a core part of Postalytics.