Postalytics campaigns deliver the online response tracking and personalization of traditional direct mail PURL campaigns, while using existing landing, web, or e-commerce pages. We’ve developed incredibly easy and flexible landing page personalization options to boost your campaign ROI.
Personalization Tools work hand in hand with Tracking Code and data loaded into Postalytics Contact Lists (Excel/CSV, HubSpot) to display unique content for each visitor.
What is Postalytics Personalization?

When a visitor from a Postalytics Campaign arrives at a page utilizing the personalization tools, they can view Variable Data from the Postalytics contact list (such as First Name, or Last Donation) or Variable Logic (such as “Display Dog Image” or “Display Cat Image”).
Common Variable Data uses include:
- Greeting the campaign target by name
- Pre-filling all or parts of a landing page form
- Suggested purchase items or donation amounts
Common Variable Logic uses include:
- Varying offers for targets coded with different personas
- Varying Calls To Action for prospects vs customers
- Varying imagery for different audience segments
How it works
For personalization to work, Variable Data and/or Variable Logic must be entered into the HTML of the page. You can access the Variable Data and Variable Logic builders from the campaign dashboard. After the HTML is updated, personalization can begin displaying unique content for different members of your campaign.
When your customers visit a personal URL (pURL) printed on your direct mail piece, they will hit our server briefly. We track the hit and then send them on to your website with their unique identifier in the query string.
The first time in, a cookie is written that contains just the unique id of the visitor. Assuming the tracking code is loaded on your main ecommerce template, all pages Joe visits on your-lawncare-ecommerce.com will be tracked and can be personalized.
Each page load that has the tracking code and detects a Postalytics ID will communicate back to Postalytics with that ID. In addition, Postalytics will send back a data object containing info that can be used on your pages for personalization.
Only visitors that have visited their PURL first and have their cookie will see the personalization on the landing page.
Using Landing Page Personalization Options With Your Page(s)
Adding personalization to your landing page(s) is straightforward. Use the Variable Data and Logic Assistants, like the “Popup Builder”, “Chrome Extension” or “WordPress Plugin” from Campaign settings.
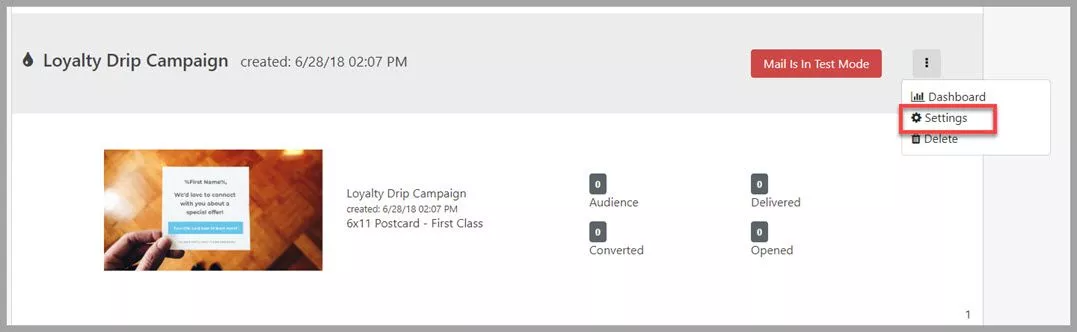
To start, choose your campaign and select 'Settings' from the action menu:
When you land on the Campaign Settings page, scroll down to the Variable Data & Logic Assistants:

Important Note: The Chrome Extension and WordPress plugins are currently disabled. Please use the Popup Builder instead.
All of the Variable Data Assistants work the same way – just click on the “token” you want to enter into your HTML. It is immediately copied to the clipboard for pasting.

Here’s an example of several variables inserted into a WordPress page:

And an example of the page when Gregg Sullivan is directed to it from his PURL:

The Variable Logic Builder lets you create logical expressions that get copied to the clipboard and pasted into the HTML. These expressions will power unique experiences for segments of your audience. Text, images, links, forms or anything that can be built in HTML (within the editor you are working in) can be called within these logical expressions.

Here’s an example of the Variable Logic pasted into a WordPress page:

And the live page – as you can see, because the recipient has a “State” variable of “New Hampshire”, rather than “MA”, he sees unique content:
Inserting Variable Data Into Unbounce Landing Pages
In your Campaign Settings scroll down to the Variable Data and Logic Assistants section:

- Click on Popup builder located under Variable Data and Logic Assistants. This will show the available Variable Data
- In the popup builder click on the variable you would like to use, this will copy the text to your clipboard
- In your Unbounce Landing page add a new text box or double click on an existing textbox and paste (ctrl/cmd V) the variable data

Inserting Variable Logic Into Unbounce Landing Pages
- Navigate to your Campaign Dashboard Settings
- Click on Popup builder located under Variable Data and Logic Assistants. This will show the available Variable Data & Logic Panels
- Click on the Variable Logic panel, build a Variable Logic statement and click Copy To Clipboard
- In your Unbounce Landing page add a new custom HTML box and paste (ctrl/cmd V) the Variable Logic block
- When complete click “Save Code”

Landing Page Personalization Options – Platforms Tested
At launch, we’ve tested Postalytics tracking in WordPress, HubSpot and Unbounce landing pages. It works beautifully. We’ll continue to test & verify more platforms over time. We anticipate no issues with an modern landing page or content management system that enables tracking codes (like Google Analytics, Facebook Remarketing, etc) and access to page source code for personalization.