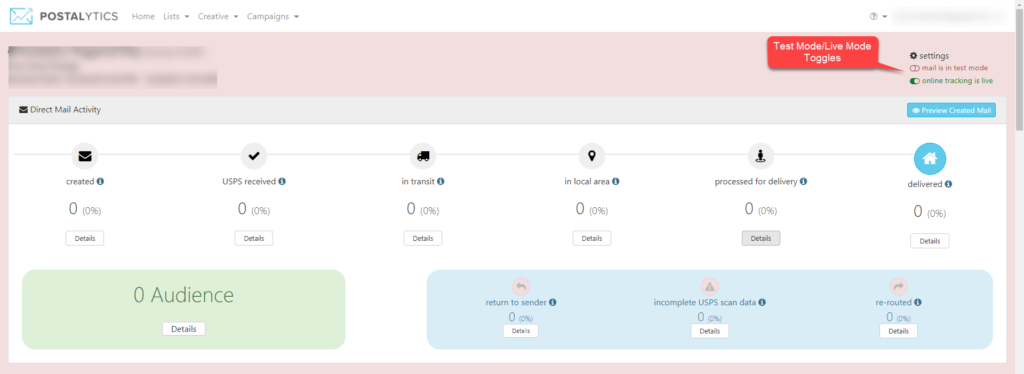
When you create a new Triggered Drip Campaign it is in “Test Mode” by default

“Test Mode” is a unique Postalytics feature that allows you to test your integrated Triggered Drip Campaign to make sure that it is working properly, without producing mail or using your Direct Mail Credits. You can send triggered drips from any of the Postalytics Integrations or API to your Postalytics campaign, in Test Mode, while you tweak and configure your creative, your data and/or your integration. Toggling your campaign between Test Mode and Live Mode is quick and easy and can be done as often as you like.
Test your Triggered Drip Campaign in 2 Steps
In order to test your Triggered Drip Campaign, you’ll first need to “fire” a trigger from your CRM/Marketing Automation tool.
In this example, we’ll use a Zapier Integration with a tool called Boingnet.
This same process can be followed for HubSpot, Salesforce or any other Triggered Drip integrations.
Step 1: Trigger A Contact
Go to your Boingnet account (or other CRM/Trigger tool), open the list you chose for your trigger and add a new contact (or create the trigger based off of your specific workflow). Be sure that all of the required fields are included. Click save to send the trigger through Zapier. Note: there can be a delay of up to 15 minutes for a “Zap” trigger to be sent to Postalytics.

Zapier allows you to check the status of the Zap by going to the Zapier dashboard and clicking the Task History tab. If it “fired” properly, you’ll see your test record in the Task History Log as shown below:

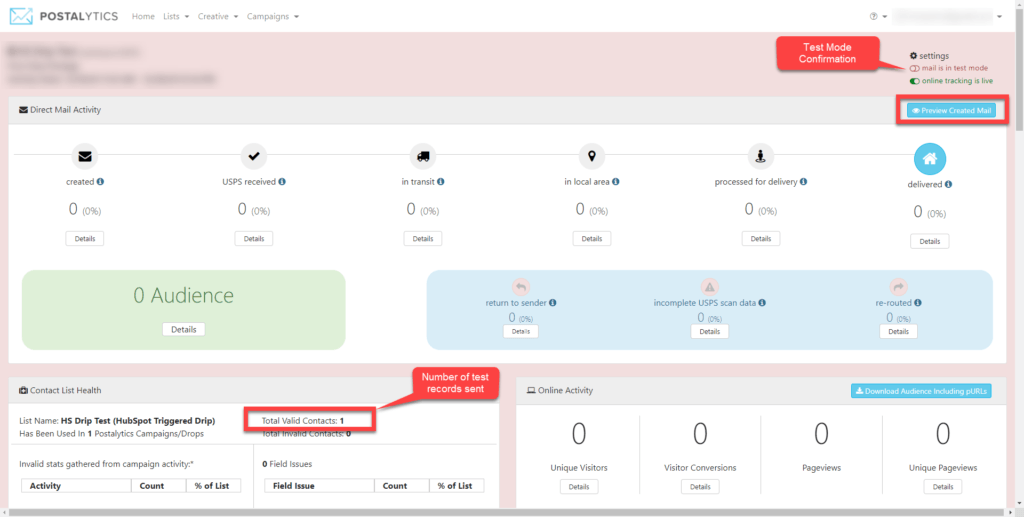
Step 2: Review PDF Mailpieces
In the Postalytics app, visit the dashboard for your Triggered Drip Campaign, in test mode. You should see Total Valid Contacts of at least one, more if you tested additional contacts. You can test as many times as you like with test mode, and you don’t have to worry about sending mail or using credits.
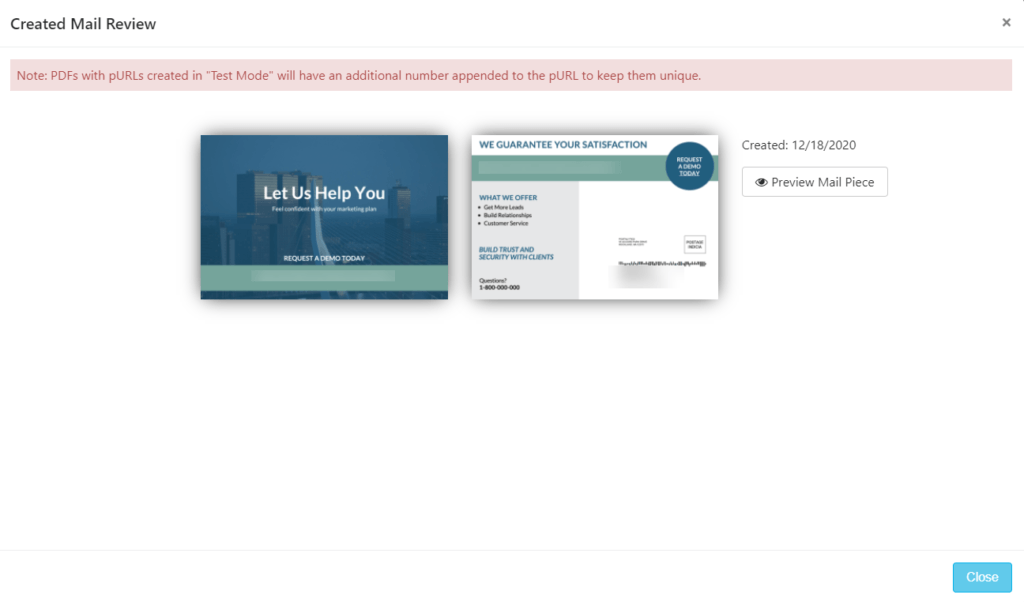
When you trigger mail to your campaign in Test Mode, it will generate a PDF that you can easily review.
Click 'Preview Created Mail'. A popup window will appear with PDF’s of each mailpiece generated for your test records. The PDF is exactly what gets created in a “Live” campaign, it just doesn’t get printed and mailed.
Remember that since you are in test mode, none of these pieces have actually been sent to the printer. However, once your campaign has been toggled to “Live Mode” and your triggers are coming through, clicking 'Preview Created Mail' will show live mail that has actually been sent to the printer.
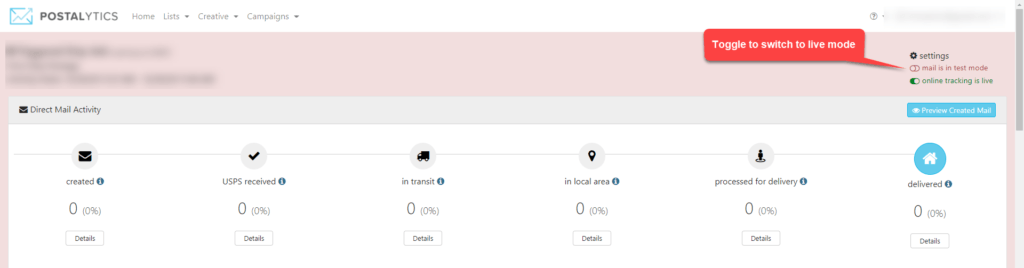
When you’re happy with the results, you can flip your Postalytics Triggered Drip Campaign to Live Mode, and then purchase your Direct Mail Credits, if needed.
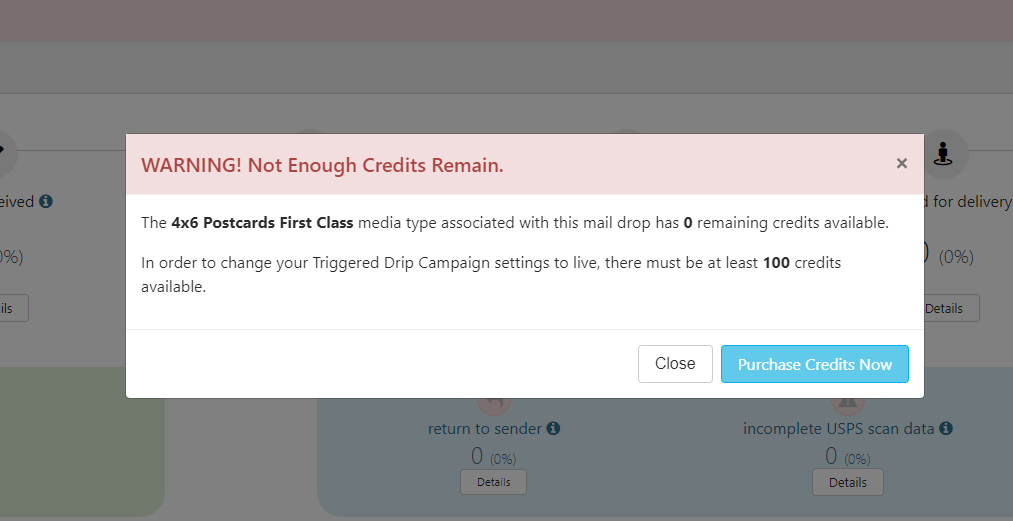
To Turn Your Campaign “Live” You Need Credits
Before your campaign can be turned live, you’ll need to have at least 100 Direct Mail credits for the format that you’ve chosen. (By format, we mean the creative format/postage combination, such as 4×6 First Class, 6×9 Standard, or Custom Envelopes). If you already have credits, your campaign will seamlessly turn live. If you don’t have at least 100 credits, you’ll need to purchase them.
A pop up window will appear when you use the toggle to switch to live mode from the Campaign Dashboard. if you do not have enough credits. Select 'Purchase Credits Now' and proceed with the steps to purchase credits.
Once live, your campaign will “listen” for your Automation tool to trigger it, and send the postcard or letter you’ve chosen to each recipient with no further interaction. You can just sit back and relax while the campaigns keep rolling along.