It’s easy to use Postalytics Campaign Events or Status Codes in ActiveCampaign to accomplish a wide variety of integration tasks. They’re designed to help marketers, salespeople, and businesspeople to automate the process of consuming delivery and response campaign data and initiate automations from direct mail that have never previously been possible.
What Are Postalytics Event Or Status Codes?
One of the incredible features of Postalytics is the ability to track the delivery and response of individual mail recipients. We’ve integrated Postalytics with the USPS Intelligent Mail Barcode system and have developed patented response tracking tools to give marketers unprecedented access to what happens after direct mail is sent.
The Event Codes are the same events that populate the Postalytics Campaign Dashboards. So, you can see a campaign level summary of what is occurring in your campaign in Postalytics, AND you can consume that data in ActiveCampaign using the Postalytics/ActiveCampaign integration.
The following codes can be consumed by ActiveCampaign Contacts and used to trigger automations:
MailPieceCreated – the mailpiece final PDF has been generated and sent to the print delivery network for fulfillment.
Addressed – some campaigns will create an event when the addressing of the mailpiece is completed.
Printed – some campaigns will create an event when the printing of the mailpiece is completed.
Mailed – the mailpiece has received the initial scan from the USPS (this is often 12-24 hours after the hand-off from the printer to the USPS).
InTransit – the mailpiece is being processed at the entry/origin facility.
InLocalArea – the mailpiece is being processed at the destination facility.
ProcessedForDelivery – the mailpiece has been greenlit for delivery at the recipient’s nearest postal facility. The mailpiece should reach the mailbox within 1 to 2 business days of this scan event. Our experience is that the majority of deliveries occur within 1 day of this scan.
**Note** Use this status code to trigger other actions based on mail delivery. For example, you can use the Processed For Delivery event, with a 2 day “Wait” in an automation sequence, to send automated messages out to coincide with mail delivery.
ReRouted – the mailpiece is re-routed due to recipient change of address, address errors, or USPS relabeling of barcode/ID tag area.
ReturnedToSender – the mailpiece is being returned to sender due to barcode, ID tag area, or address errors.
pURLOpened – the recipient has visited their pURL. Each visit will trigger a new event.
pURLCompleted – the recipient has visited their Goal URL. Each visit will trigger a new event.
Status Codes for Canadian Mailings
Because Canada Post does not provide tracking through the mail stream, mailings in Canada will have fewer Status Codes that will appear in ActiveCampaign. For Canadian mailings, the Status Codes that you will see are:
MailPieceCreated – the mailpiece final PDF has been generated and sent to the print delivery network for fulfillment.
Addressed – the addressing of the mailpiece has been completed.
Printed – the printing of the mailpiece has been completed.
Mailed – the printer has handed off the mailpiece to Canada Post.
pURLOpened – the recipient has visited their pURL. Each visit will trigger a new event.
pURLCompleted – the recipient has visited their Goal URL. Each visit will trigger a new event.
How To Setup The Postalytics Event Codes In ActiveCampaign
In order to begin using the Postalytics Event Codes in ActiveCampaign, there’s a little bit of setup. Some of these steps are one time requirements, while others need to be done for each Postalytics Triggered Drip campaign you want to populate your ActiveCampaign Contacts with.
Note: This sequence assumes you’ve already setup Postalytics as a “Connected App” within ActiveCampaign, and that you’ve integrated a Postalytics Triggered Drip Campaign with an ActiveCampaign Automation. If you haven’t yet done this, please see:
Step 1: Create A Field In The ActiveCampaign Contact Record To Store The Postalytics Event Codes
One time setup OR each campaign – depending on the use case.
The first step is to actually “Add a Field” to the ActiveCampaign Contact record that can be used to store the Postalytics Event Codes. This can be done once and that field can be used to store the Postalytics Event Codes for your first or all campaigns, or, you can create unique New Fields for each Postalytics campaign. For the purposes of this article, we’ll stick to a one time use.
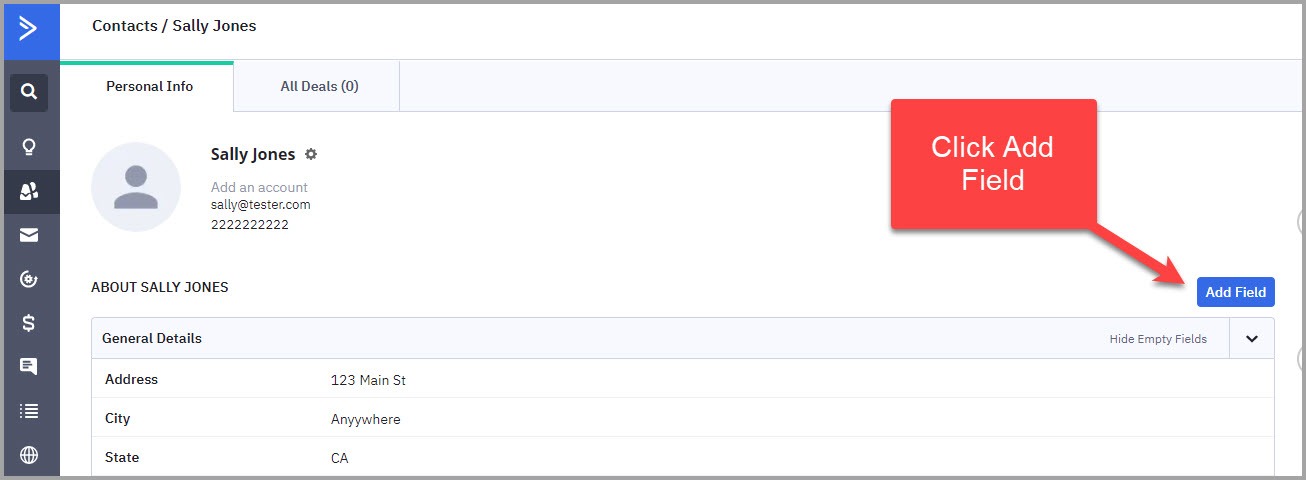
Open and ActiveCampaign Contact (any contact, this action will impact all Contacts) and click 'Add Field'.
Give the new field a name, like “Postalytics Event” for a general field for all campaigns, add it to a group if you’d like, and leave the default Field Type as “Text Input”.
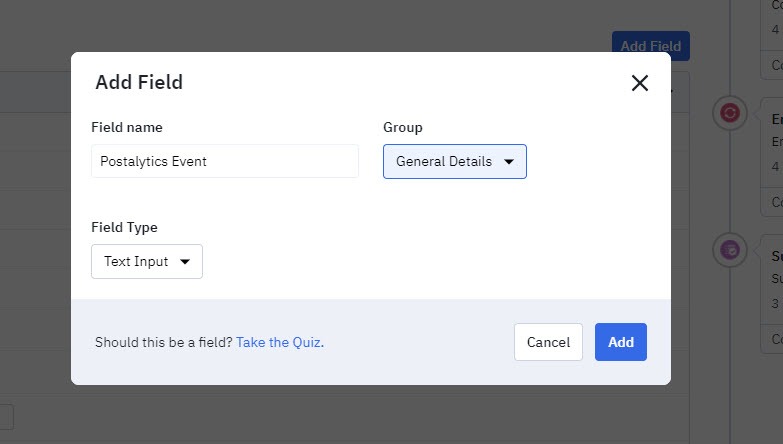
This will create a new field in the ActiveCampaign Contact:

Step 2: Add A New Resource From The Connected App
This needs to be done for each Postalytics campaign that you want to use Event Codes from:
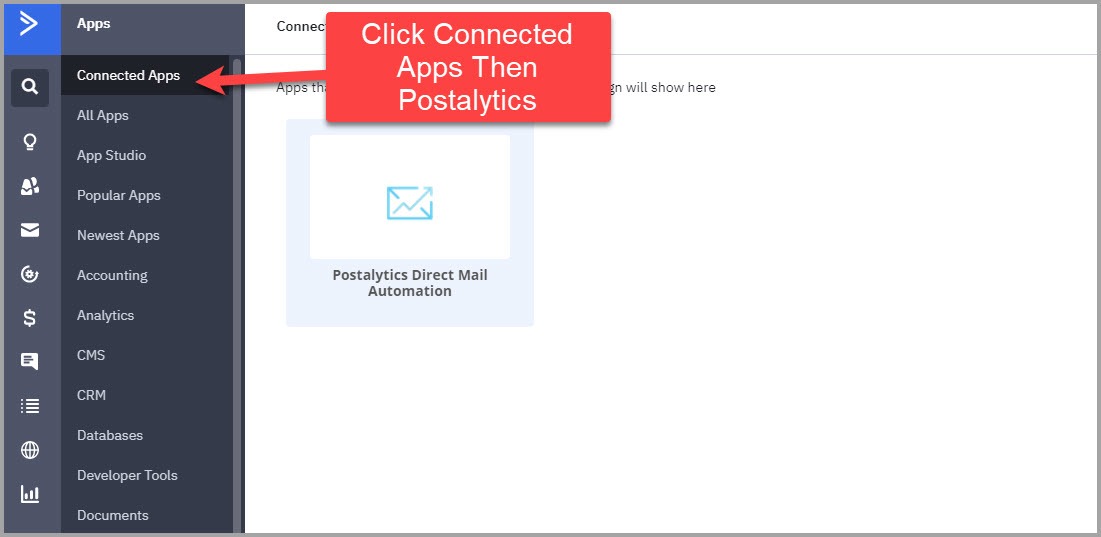
Next, you’ll select Postalytics from the “Connected Apps” option in the Apps menu:
And then choose 'Add New Resource':

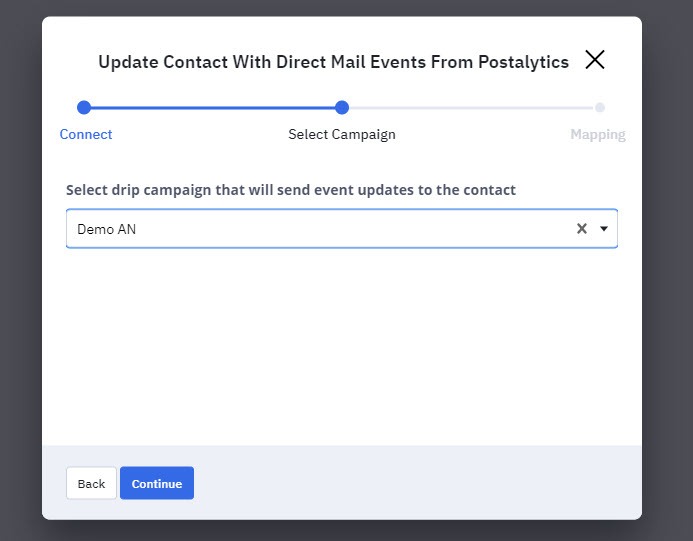
Step 3: Connect Your Postalytics Campaign And Map Fields
This needs to be done for each Postalytics campaign that you want to use Event Codes from:
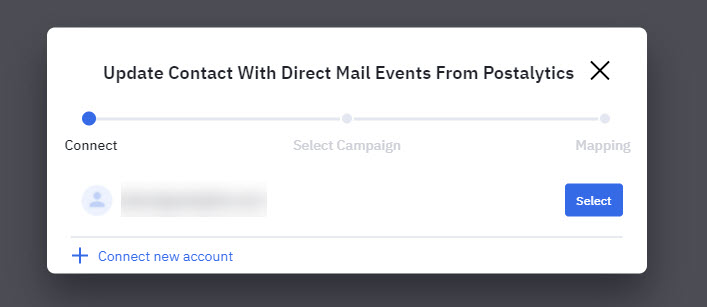
Now select your connected account and select the Postalytics Campaign that you want to consume the Event Codes from:
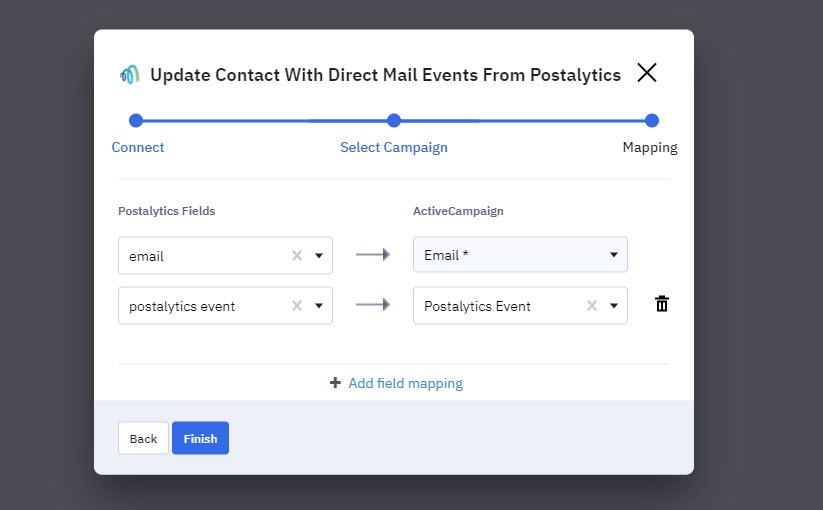
And finally, you’ll “Map” 2 fields between your Postalytics Account and your ActiveCampaign Contact record.
Note: You must use the “Email” field as the “Key” for this mapping. Without it, the integration will not work. In addition, the Email field needs have been mapped in the original ActiveCampaign/Postalytics automation. Please see Automation Mapping for more information.
The only two fields you need to map between the Postalytics Triggered Drip Campaign and the ActiveCampaign Contacts are the email fields and the Postalytics Event Fields:
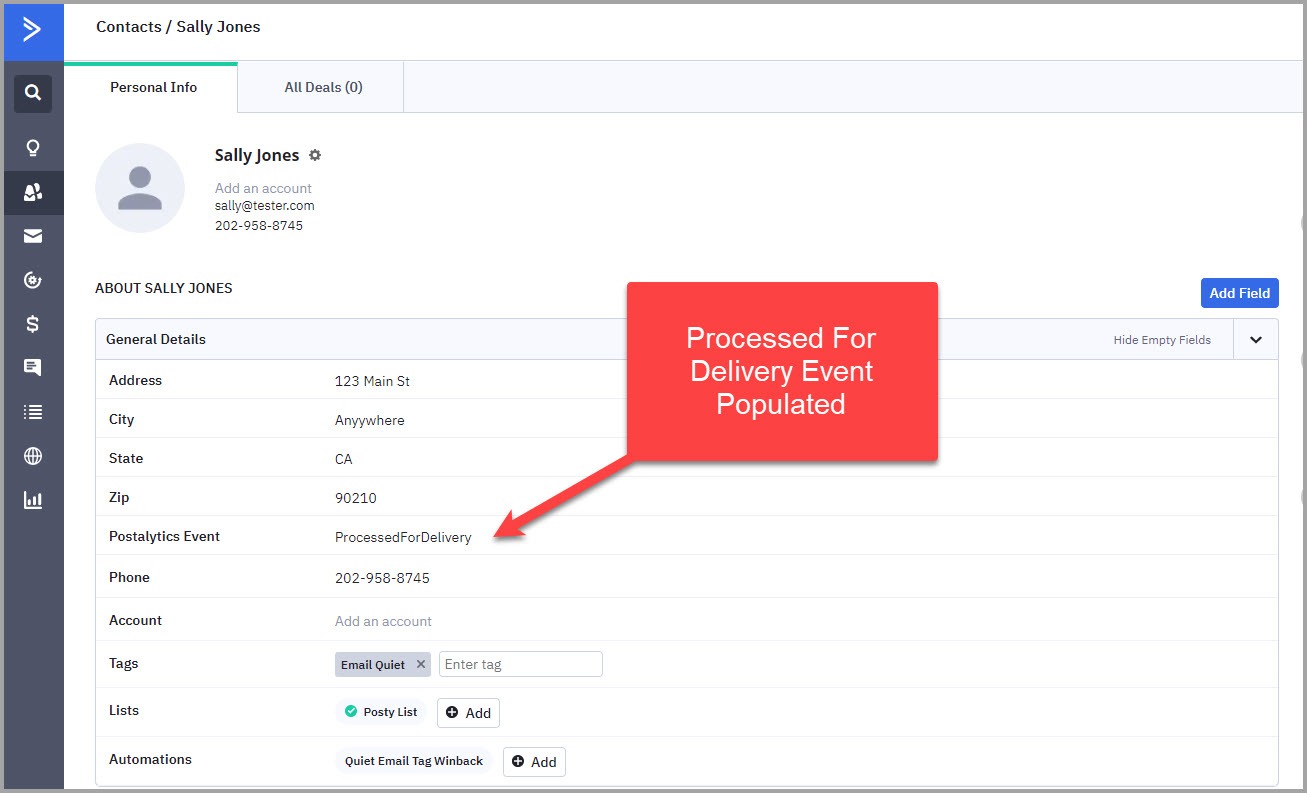
The setup is now done, and your Postalytics Triggered Drip Campaign will begin to populate the ActiveCampaign Contact field you created with Event Codes as soon as your campaign begins sending mail.
Here’s an example of an Event Code that has populated:
Common Postalytics Event Code Use Cases
Postalytics and ActiveCampaign can be easily used together to automate many tasks that have traditionally been too hard, time consuming or expensive to attempt with traditional direct mail technology. Some typical things that marketers focus on include:
- Sending an email to a mail recipient based on the timing of the mail delivery
- Triggering the next step in a workflow
- Sending a text message to a sales rep when a mail recipient completes their online goal URL
If you’d like to brainstorm with us on great use cases for Postalytics Status Codes in ActiveCampaign, please reach out! We can often help think through the pluses and minuses of different approaches.